Pages

Thursday, March 31, 2011

EYBA BIRTHDAY CUPCAKES


This is my 101 and final entry for March , Double Chocolate Cupcakes with Chocolate Ganache for Eyba Belated Birthday. For recipe please refer to previous entry on Double Chocolate Cupcake.

Tomorrow is 1st April ending month of 2011 1st quarter. Time really flies that fast and tomorrow is also an APRIL FOOL DAY kah...kah....well I'm to old for that anyway stay tune more recipes to come and coming up soon AYU'S RED VELVET CUPCAKE another belated Birthday cake.

__________________________________________________________________

Double chocolate cupcake with Chocolate Ganache untuk ulang tahun Eyba baru-baru ini. Esok 1 hb April bermulanya suku terakhir tahun 2011, sekejap betul masa berlalu dan esok jugalah APRIL FOOL day, hati-hati kalau ada yang hendak mengena. Banyak lagi resipi untuk bulan April ini, terus bersama saya,
__________________________________________________________________

Next Post - Breakfast Menu
__________________________________________________________________

AYAM KICAP / SOYA SAUCE CHICKEN


COOKING CHALLENGES BY TYCA - AYAM MASAK KICAP/FRIED CHICKEN IN SOYA SAUCE

Here is Tyca piece of work and her favorite dish.

INGREDIENTS
1 chicken cut into bite sizes / 1 ekor ayam potong kecil atau potong 16.
2 tbsp turmeric powder / 2 sdb serbuk kunyit
2 tsp salts / 2 sdt garam
Suffiecient oil for deep frying / Minyak secukupnya untuk menggoreng ayam

Add salts and turmeric to chicken and deep fried chicken till cooked. Set aside/ Gaulkan ayam dengan garam kunyit dan goreng ayam hingga masak. Angkat dan ketepikan.

Spices
1 stick cinnamon / 1 kayu manis
2 star anise / 2 bunga lawang
3 pieces cardamon / 3 buah pelaga
Ingredients to be blend
2 inches ginger/ 2" halia
3 garlic / 3 ulas bawang putih
5 shallots / 5 ulas bawang merah

Blend all ingredients and set aside / Blend semua bahan dan letak sebelah

Seasoning
2 tablespoon Hoisin Dark Soy Sauce/ 2 sdb sos hoisin
1 tablespoon thin soy sauce /  1 sdb kicap cair
1 tablespoon sweet soy sauce / 1 sdb kicap manis

Garnishing
1 tomato sliced into ring / 1 biji tomato dihiris bulat
1 onion sliced into ring / 1 bawang besar dipotong bulat
1 leeks sliced diagonal / 1 leeks hiris menyerong

_________________________________________________________________

Ayam Masak Kicap mempunyai beberapa variasi, ada yang pedas, ada yang berempah dan ada yang simple biasa. Sebagai permulaan dan sementara Tyca memahami bahan-bahannya, saya sediakan Tyca resipi masak kicap yang simple, Mudah bagi orang baru untuk membuatnya. Ayam Kicap adalah favoritenya so esok nanti kalau dah ke U, bolehlah berdikari dan masak sendiri,
_________________________________________________________________

Nedxt Post - Eyba Birthday Cake
_________________________________________________________________

TELUR GORENG TAUCHO/ TAUCHO FRIED EGGS


Cooking Challenges by Myraz - TAUCHO FRIED EGGS / TELUR GORENG TAUCHO

INGREDIENTS
5 eggs - fried bull's eyes / 5 biji telur goreng mata sapi
1 tomato sliced into rings / 1 biji tomato dibelah bulat
1 onion sliced into rings / 1 biji bawang besar dibelah bulat
1 leeks cut diagonal / 1 leek dipotong menyerong
2" ginger julienned / 2" halia hiris memanjang
3 cloves garlic chopped / 3 ulas bawang putih dicincang
1 cup water / 1 cawan air
3 tbsp dark soya sauce / 3 sdb kicap pekat
2 tbsp taucho / 2 sdn taucho
2 tbsp oil / 2 sdb minyak masak

PREPARATION

Heat up oil. Saute ginger and garlic till fragrant. Add in taucho and soya sauce. Add in water and allow to boil. Finally add in eggs, onion, leeks and tomato. Ready to serve. Add more water if you want more gravy / Panaskan minyak, tumis bawang puyih dan halia sehingga naik baunya. Masukkan taucho dan biar seketika. Masukkan air dan biar mendidih. Akhir sekali masukkan telur goreng tadi, bawang besar, leeks dan tomato. Tambahkan air jika mahukan banyak kuah. Sedia dihidang.

__________________________________________________________________

Menu ini disediakan oleh Myraz. Telur Goreng Taucho. Ini merupakan sajian kegemaranya. Ringkas dan mudah, bersesuaian dengan yang baru belajar memasak. Menu ini sesuai disediakan kalau kehabisan stok bahan basah. Saya gelarkan menu ini, menu emergency.
__________________________________________________________________


PATY'S KITCHEN COOKING CHALLENGES


AYAM KICAP / CHICKEN IN BLACK SOYA SAUCE
BY TYCA
WO..wo... it's PATYSKITCHEN cooking challenges and competition!!!!! yeah it's true....but it's not open to all. It's just a family affairs. Just among my daughters. When I started this cooking blog my conscience were cleared, I wanted to record recipes of my family favorite so that my children will have some reference when they need it later. I was hoping that this blogging things can build much closer bonding between me and my children and not to mention that my children will build the interest in cooking.

After seven month, I don't see any interest by my children to take up cooking, not at all. That worries me, I don't expect them to be a cook good but at least they should know some basic, some simple dish I believe is enough. So what I did was I listed down a simple daily recipes and told them that I wanted them to try. I wanted them to have their own recipe books. I shown them a few blogs by teenage girl with cooking column and challenged them to do the same. Each of them have their own personal blog. I told them to include this cooking adventure as part of a growing up teenage girl experiences. It sounds good ha,.... and to my surprises they agreed with my suggestions and here goes the PART I of these cooking challenges.


TELUR TAUCHO / FRIED EGGS IN TAUCHO SAUCE
BY MYRAZ
I guided them through the processes, I created an environment of MENTOR and PORTEGE and guided them to do the write up in their blogs. So far so good. my youngest daughter have a few insertion of her own cooking experiences in her blog. To me it was a positive sign and hope to do more with them.

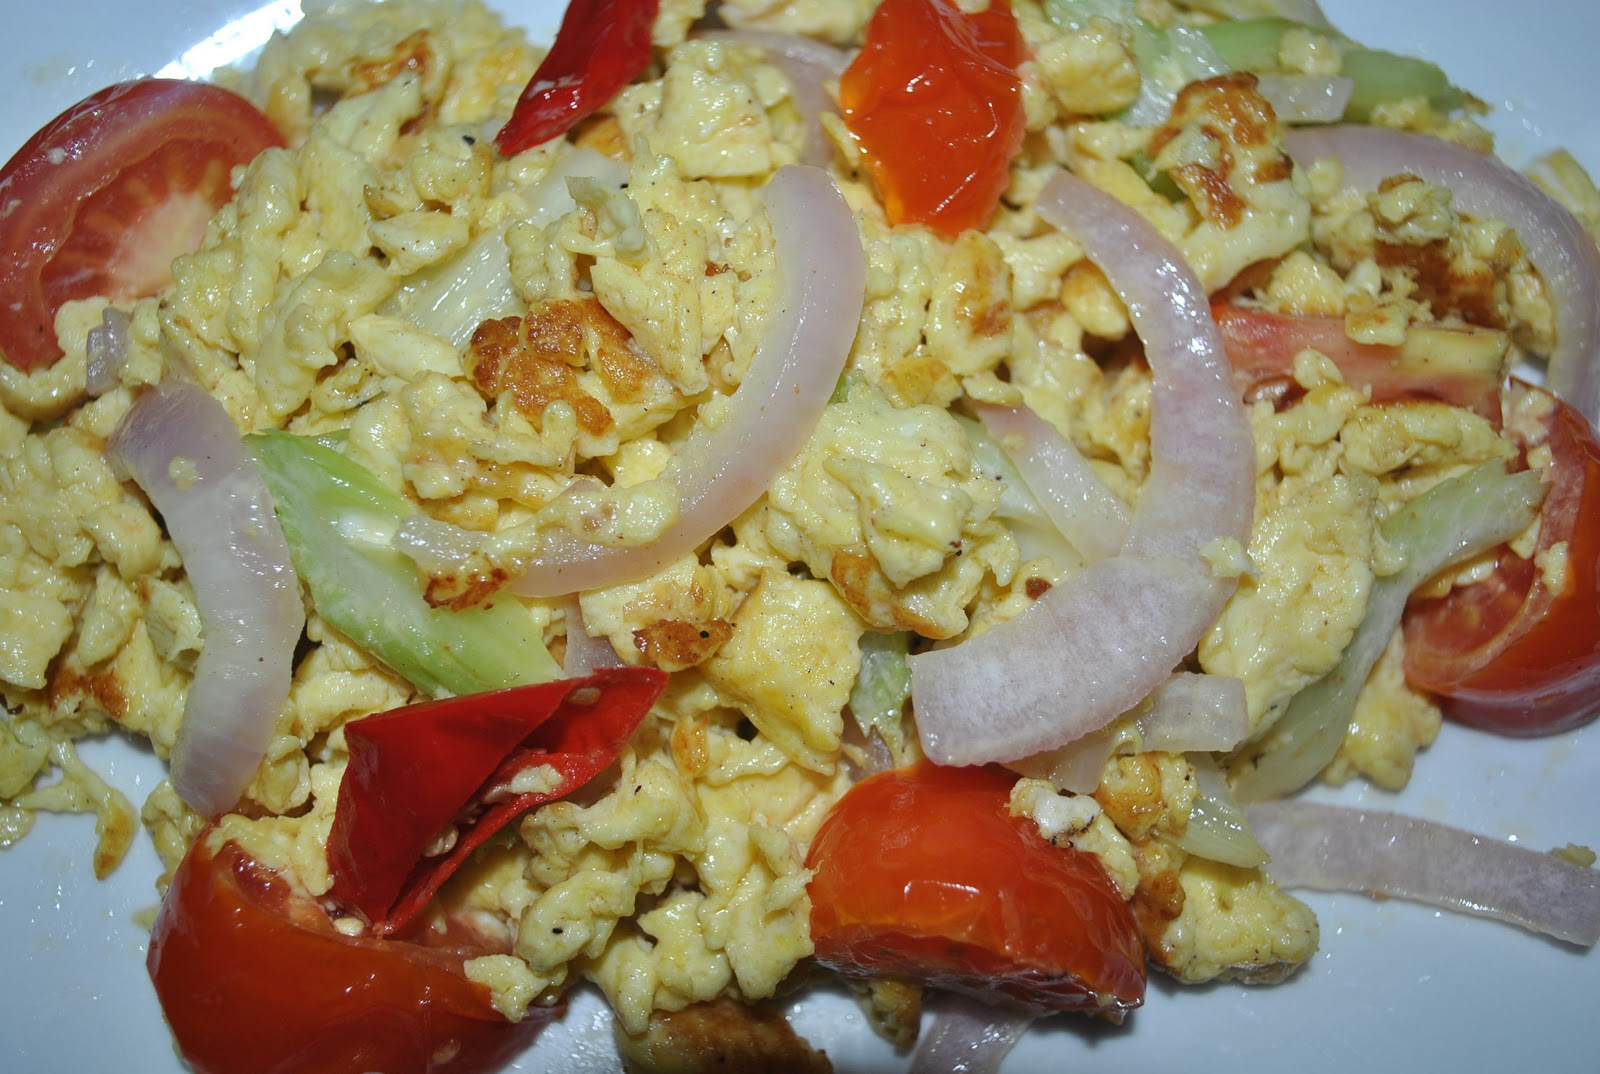
I will be publishing their experiences and recipes from time to time and for a start these were their first dishes, their favorite dishes, AYAM MASK KICAP by Tyca, TELUR GORENG TAUCHO by Myraz and TELUR PECAH by Eyba. Let's take a look at the youngest cooking TELUR PECAH. Telur Pecah is a scrambled eggs. Eyba loves omelette so much. I think she is not ready to prepare the omelette, instead I asked her to prepare this scrambled eggs, slowly I will develop her to do the omelette. A simple recipe with just eggs, onion and some fresh tomatoes.

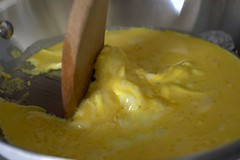
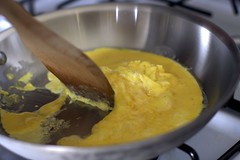
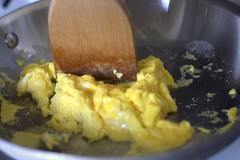
TELUR PECAH/SCRAMBLED EGGS
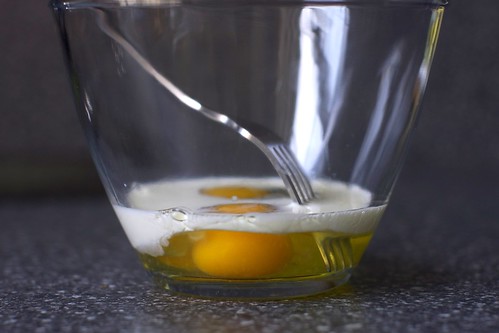
5 eggs /  biji telur
1 onion sliced thinly / 1 biji bawang besar hiris nipis
1 tomato  sliced thinly / 1 biji tomato hiris nipis
salts and pepper to taste / lada dan garam secukup rasa
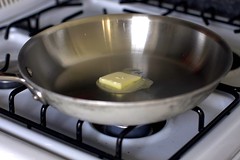
3 tbsp cooking oil / 3 sdb minyak

TELUR PECAH/ SCRAMBLED EGGS  BY EYBA

In a large bowl beat eggs with fork. At in salts and pepper. Leave aside.
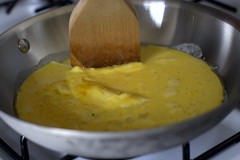
Heat up oil and fry the eggs. Continue stir and beat the eggs. When eggs are almost done add in onion, mix well and lastly add in tomato. Ready to serve/Pukul tekur dan masukkan garam dan lada sulah. Panaskan minyak dan goreng telur sambil dikacau-kacau memecahkan telur itu. Bila telur  hampir masak, masukkan bawang besar sambil dikacau terus. Akhir sekali sebelum memadamkan api masukkan tomato. Sedia dihidang.

_________________________________________________________________

Ini adalah special entry sajian yang disediakan oleh anak-anak saya. Saya telah memberikan mereka cabaran untuk memasak menu kegemaran mereka. Ini adalah salah satu cara untuk mengajak mereka ke dapur. Sebenarnya  tidak ada seorang pun anak-anak saya yang berminat memasak. Bloging ini masih belum membuka pintu hati mereka untuk sama-sama ke dapur. Ini membimbangkan saya, jadi saya terpaksa menggunakan approach yang lain untuk mengajak mereka berjinak-jinak kedapur. Saya  menyenaraikan resipi-resipi yang  perlu dipelajari mereka dan mengajak mereka untuk sama-sama mencuba. Kebetulan kesemua mereka mempunyai blog sendiri jadi saya sarankan mereka menyediakan ruangan masakan dalam blog mereka, share pengalaman memasak mereka bersama teman-teman mereka. Nampaknya cara ini berjalan dan hari ini saya nak kongsikan resipi-resipi dan masakan yang dibuat oleh anak-anak saya. Resipi-resipinya mudah dan ringkas. So untuk entry ini dan dua lagi entry akan datang saya mempunyai chef jemputan dengan resipi TELUR PECAH oleh Eyba, TELUR MASAK TAUCHO oleh Myrax dan AYAM MASAK KICAP oleh Tyca.

_________________________________________________________________

Next Post - Telur Masak Taucho

__________________________________________________________________


HONEYDEW SAGO DESSERT AKA MI GUA XI MI LU

Mi Gua Xi Mi Lu is a very popular chinese dessert, which normally served in many Chinese course menus, dinners and wedding functions. I made some the other day since I have some cantaloupe in the fridge. The melon used has got to be ripe so that the sweetness from the melon enhances the outcome of this dessert. Some recipes require the use of coconut milk and/or evaporated milk. I personally prefer using just coconut powder. With pandan leaf, the aroma of this dessert is fantastic and the taste is marvelous. TRY this I guarantee you will love it. For the same recipe you can apply to watermelon and  jackfruits.


INGREDIENTS
  • 2 Cups Honeydew Melon / Cantaloupe, Diced Finely
  • 1/2 Cup Tapioca Pearls
  • 5 Cups Water
  • 2/3 Cup Sugar
  • 2 cups water
  • 2 Pandan Leaves, Knotted (**Optional)
  • 1 packet powdered coconut milk.
PREPARATIONS
  1. In a pot, boil 5 cups of water and add tapioca pearls when water is boiling. Cook for 15 minutes, turn off heat and cover for 10 minutes for the pearls to continue cooking. **Do not overcook the tapioca pearls as you would end up with a pot of glue!! Then strain the cooked tapioca pearls, run it through cold water and set aside.
  2. In another pot, add sugar and Pandan leaves to remaining 2 cup of water. Boil the mixture until all sugar has dissolved. Add in the powdered coconut milk. Stir constantly.
  3. Add diced melon and cooked tapioca pearls. Chill for about 3-4 hours until dessert is cold. You may also add ice cubes before serving.
___________________________________________________________________________

Sajian ini memang terkenal dikalangan masyarakat Cina terutama di majlis-majlis perkahwinan dan jamuan-jamuan ala Cina. Biasanya dihidang di akhir majlis sebagai sajian pencuci mulut. Dessert ini memang favorite saya dan selalu berharap ia merupakan menu penutup setiap kali menghadiri majlis hidangan Cina. Sungguh lemak dan enak. Untuk resipi buah honeydew mestilah yang masak. Sago banyak digunakan untuk ini. Sejukkan di dalam fride 3-4 jam sebelum dihidang atau boleh juga diletakkan ais batu. Amat sesuai dalam cuaca panas.
__________________________________________________________________________


Next Post - Paty's Kitchen Cooking Challenges


__________________________________________________________________________

SINIGANG NA MANOK - CHICKEN SINIGANG A TASTE OF FILIPINO

Sinigang is a Filipino soup dish with a tamarind base which is well known for its sour taste and the variety of ingredients that you can put in it. The dish often incorporates fish (bangus), pork, shrimp, or beef, along with vegetables like string beans, kangkong, okra, pepper, radish, and kamatis (tomato). 

The best kind of sinigang is one that’s mouth-curdling sour but with the right amount of salt and spiciness.This is my first attempt and it seems that my children love this dish. Sinigang has the similarity with our Kuah Singgang. The color of the soup and the taste almost the same except that Sinigang is more soury. I used chicken for my Sinigang - Na Manok Sinigang. If you love Tom Yam or even Asam Pedas this dish fall under the same category.
So here’s the recipe I used if you’d like to give cooking sinigang a shot:


 INGREDIENTS
2 cloves crushed garlic
1 onion
6 medium-sized tomatoes
1 tbps patis
1 whole chicken, cut into 16 pieces
6 cups water
3 cups kangkong leaves
1 radish cut into ring thinly
1 1/2 tsps salt
3 cups crushed tamarind (crushed in hot waster)
1 pc tamarind broth cube (optional)
salts to taste.

  1. Saute the garlic in cooking oil until golden brown. Add onions and cook until they become transparent. Toss in the tomatoes and the tamarind, then add the patis.(fish sauce)
  2. Put in the beef and cook covered for five minutes. Pour in the rice water and cover tightly. Let boil. As soon as it boils, reduce the heat and radish simmer until chicken becomes tender. Put in the kangkong and  radish and tomato.
__________________________________________________________________

Kalau anda suka Tom Yam anda pasti akan suka Sinigang. Sinigang ini adalah sajian popular dari Filipina. Terdapat beberapa variasi Sinigang, ikan udang, ayam dan daging, paling top ialah daging khinzir. Ini pertama kali saya mencuba. Boleh tahan sedapnya sama seakan Singgang kita, cuma Sinigang ini agak masam sedikit kerana Sinigang ini menggunakan asam keping yang direndam dengan air panas terlebih dahulu.

Sedap dan sesuai makan dengan nasi panas.


_________________________________________________________________________

Next Post - Mi Gua Xi Mi Lu - Honeydew Sago Dessert

_________________________________________________________________

BAKING PAN SIZES - PAN DIMENSIONS AND VOLUME

This is a very useful information on baking pan sizes  in terms of dimensions and volume. It is important to understand how the measurement works to avoid disappointment in baking. Information extracted from joyofbaking.com You can refer to their website for more details.

Baking pans come in a wide range of sizes, from a round cake pan to a loaf pan.  Different size pans hold different capacities (volumes) of batters and this must be taken into account when substituting one pan size for another in a recipe.  If you use a larger pan than asked for in a recipe this will change the depth of the batter (shallower) and therefore the batter will bake much more quickly.  Likewise, if you use a smaller pan than asked for in a recipe this will also change the depth of the batter (deeper) and therefore the batter will take longer to bake.


To determine the pan's dimensions always measure inside edge to inside edge of the pan so that you do not include the thickness of the pan in your measurement.


To measure the depth, place your ruler straight up from the bottom of the pan (do not slant the ruler). 

To determine the pan's volume (how much batter it will hold), pour pre-measured water by the cupful until the pan is filled to the brim.

Once you have measured the pan's dimensions and volume you can check the table below for pan substitutions.  The ideal pan substitution is one that keeps the same batter depth as in the original recipe.  In this way you do not have to make any drastic changes in baking times and temperatures.   For example;  you could substitute a 8 x 8 x 1 1/2 inch square pan (6 cups) for a 8 x 2 inch round pan (6 cups) without changing the baking time or oven temperature stated in the original recipe.

If the new pan makes the batter shallower than in the original recipe, this will cause the heat to reach the center of the pan more quickly and you will have more evaporation.  To solve this problem you need to shorten the baking time and raise the temperature of the oven slightly.  Correspondingly, if the new pan makes the batter deeper than in the original recipe, this will cause less evaporation and the batter will take longer to cook.  To solve this problem you need to lengthen the baking time and lower the temperature of the oven slightly.  This will keep the batter from over-browning.

Note:  Keep in mind that most home ovens will only accommodate up to a 17 x 14 inch (43 x 36 cm) pan.

Conversions:  (Dimensions) 1 inch = 2.54 cm  (Volume) 1 cup = 237 ml

Approximate
Pan
Dimensions (inches)
Approximate
Volume (cups)
Approximate
Pan
Dimensions centimeters)
 (cm)
Approximate Volume (milliliters) (ml)
Round
________________________
Round

__________________
6 x 2 inches4 cups15 x 5 cm948 ml
8 x 1 1/2 inches4 cups20 x 4 cm948 ml
8 x 2 inches6 cups20 x 5 cm1.4 liters
9 x 1 1/2 inches6 cups23 x 4 cm1.4 liters
9 x 2 inches8  cups23 x 5 cm1.9 liters
10 x 2 inches11 cups25 x 5 cm2.6 liters
SpringformSpringform
9 x 2 1/2 inches10 cups23 x 6 cm2.4 liters
9 x 3 inches12 cups23 x 8 cm2.8 liters
10 x 2 1/2 inches12 cups25 x 6 cm2.8 liters
BundtBundt
7 1/2 x 3 inches6 cups19 x 8 cm1.4 liters
9 x 3 inches9 cups23 x 8 cm2.1 liters
10 x 3 1/2 inches12 cups25 x 9 cm2.8 liters
TubeTube
8 x 3 inches9 cups20 x 8 cm2.1 liters
9 x 3 inches12 cups23 x 8 cm2.8 liters
10 x 4 inches16 cups25 x 10 cm3.8 liters
SquareSquare
8 x 8 x 1 1/2 in.6 cups20 x 20 x 4 cm1.4 liters
8 x 8 x 2 inches8 cups20 x 20 x 5 cm1.9 liters
9 x 9 x 1 1/2 in.8 cups23 x 23 x 4 cm1.9 liters
9 x 9 x 2 inches10 cups23 x 23 x 5 cm2.4 liters
10 x 10 x 2 inches12 cups25 x 25 x 5 cm2.8 liters
RectangularRectangular
11 x 7 x 2 inches6 cups28 x 18 x 5 cm1.4 liters
13 x 9 x 2 inches14 cups33 x 23 x 5 cm3.3 liters
Jelly RollJelly Roll
10 1/2 x 15 1/2 x 110 cups27 x 39 x 2.5  cm2.4 liters
12 1/2 x 17 1/2 x 112 cups32 x 44 x 2.5 cm2.8 liters
LoafLoaf
8 x 4 x 2 1/2 in.4 cups20 x 10 x 6 cm948 ml
8 1/2x4 1/2x2 1/26 cups21 x 11 x 6 cm1.4 liters
9 x 5 x 3 inches8 cups23 x 13 x 8 cm1.9 liters
MuffinMuffin
1 3/4 x 3/4 in.1/8 cup4.5 x 2 cm30 ml
2 3/4 x 1 1/8 in.1/4 cup7 x 3 cm60 ml
2 3/4 x 1 1/2 in.1/2 cup7 x 4 cm120 ml
3 x 1 1/4 inches5/8 cup8 x 3 cm150 ml
Heart ShapedHeart Shaped
8 x 2 1/2 inches8 cups20 x 6 cm1.9 liters

GOOD MORNING MALAYSIA - BREAKFAST MENU - TOAST AND SCRAMBLED EGGS

My daughter Tyca starts her driving lesson today. She woke up early and prepared this breakfast, So I am off from the kitchen for breakfast today. A simple breakfast from someone learning to master the cooking skills - Toast and Scramble Eggs.


TYCA'S VERSION
large eggs, preferably free-range or organic
sea salt and freshly ground black pepper
a good knob of butter, plus extra to serve
4 slices of bread
1/2 cup milk
1 tbsp cheese

  1. Crack eggs into bowl and beat lightly with fork; add a little water, milk or sour cream to thin and fluff; add salt, pepper, herbs and combine.
  2. Meanwhile, melt butter in saucepan and sauté shallots until soft; add vegetables if using and sauté for a few minutes.
  3. Pour egg mixture into pan and cook over medium heat, stirring gently until eggs are almost set.
  4. Sprinkle with cheese and continue to cook until eggs are completely set to desired degree of doneness. Spoon on top of grilled bread and serve open-face.


TIPS BY SMITTENKITCHEN.COM FOR BUTTERY AND CREAMY SCRAMBLED EGGS

Scrambled eggs can be one of the most fantastic, luxurious breakfasts around if you remember a few key things:
  • always use really fresh free-range or organic eggs and
  • good-quality butter, and
  • always keep the eggs moving slowly
  • scrambled eggs should have a short lifespan.
  • they should always be taken out of the pan before they are done —  look for about 85 to 90 percent doneness, they should look a bit wet. 
fork beaten 
    start with butternudgepullpushchoppy choppybreaking up the big bits

    Here's smittenkitchen.com version. I love this, buttery and creamy - Learn the technique here.

    Scrambled Egg Toast
    For 1; scale as needed
    2 large eggs
    2 tablespoons milk, half-and-half or cream
    1/8 teaspoon salt
    Few grinds black pepper
    2 teaspoons butter or olive oil
    A 1-inch thick piece of bread
    1 tablespoon goat cheese, softened a bit (though cream cheese is a great swap here)
    1 teaspoon chives or scallion greens, thinly sliced


    1. Set your table and pour your coffee. I am an absolutely nut about eating my eggs the second they come out of the pan, and to do this, your table needs to be ready for you; your troops should be gathered. Toast your bread, then smear it with the goat cheese and sprinkle it with half the chives. Set it aside. (P.S. If you decide to butter it before adding the goat cheese, I will not tell anyone.)
    2. Beat eggs with milk, salt and pepper in a small bowl, with a fork, until combined, with a few big bubbles. Heat a large sauté pan over medium-low heat; once hot, add butter. Once butter is melted and foamy, add eggs and pause; count to 20 if you must, but let those eggs begin to set up before you start nudging away at them. Using a wooden spoon or spatula, begin push your eggs once from the outside to the center of the pan and pause again; count to 5 if you must, before continuing with another push. Continue in this manner around the pan as if you were trying draw spokes of a wheel through your eggs with your spatula, pausing for 5 seconds after each push. Go around the pan as many times as needed, until your eggs in the center are ribbony damp pile — it should look only 75 percent cooked. Use your spoon or spatula to break up this pile into smaller chunks — to taste. Your eggs should now look almost 90 percent cooked.
    3. Immediately remove the pan from the heat and pile the scrambled eggs bits high on your goat cheese toast. Sprinkle with an additional grind of black pepper and remaining chives. Eat immediately.Do this and you’ll get luscious, buttery, creamy eggs every time.
    ___________________________________________________________________________

    Asalamuailaikum and SELAMAT PAGI MALAYSIA, hari anak saya Tyca memulakan kelas memandunya. Selepas memperolehi keputusan cemerlang dalam SPMnya baru-baru ini dan dalam persiapan menunggu tawaran memasuki University, Tyca terpaksa mengambil kursus memandu supaya senang nanti, nak ke kuliah. Kelas bermula awal pagi dan entah apa mimpinyanya hari ini, dia minta kebenaran saya untuk siapkan sarapan. Pucuk dicipta ulam mendatang, inilah saat-saat yang ditunggu-tunggu, bolehla saya relax sedikit membaca surat khabar dahulu sebelum memulakan tugas.

    Breakfast Tyca simple aje, ialah breakfast orang yang baru berjinak-jinak hendak ke dapur, Toast dan Scrambled Eggs. Breakfast ini sebenarnya tidak memerlukan resipi, main campak-campak aje, tetapi walau bagaimanapun untuk mendapatkan scrambled eggs yang lembab dan tidak kering ada rahsianya. Tips penyediaan dari smittenkitchen.com disediakan di atas. Apa pun saya lebih suka kalau scrambled eggs dimasak menggunakan micowave, telur jadi gebu dan lembab. SELAMAT BERSARAPAN SEMOGA PAGI INI MEMBAWA KEBERKATAN 
    ___________________________________________________________________________

    Next Post - Tips on Baking Pan by joyofbaking.com
    ___________________________________________________________________________

    Wednesday, March 30, 2011

    THAI SQUID SALAD / KERABU SOTONG THAI


     INGREDIENTS
    • 500 g Squids
    • 2 tbsp fresh mint leaves
    • 3 tbsp lime juice
    • 2 tbsp fish sauce
    • 2 tbsp roasted sticky rice powder
    • 3 tbsp finely chopped spring onion
    • 2 tbsp coarsely chopped fresh coriander
    • 1 tbsp coarsely ground dried red chilli
    • ½  cup coarsely chopped shallot
    • 1 cup water (or chicken stock)
    • 2 tomatoes sliced

    PREPARATION
    1. Heat water in a pot until boiling.
    2. Clean and slice squids into ring.
    3. Spoon into boiling water for 1 minutes.
    4. Transfer the cooked squid to a medium bowl.
    5. Add the shallot, spring onion, coriander, and most of the mint, reserving a few leaves for a garnish.
    6. Add the lime juice, fish sauce, rice powder, chilli, and sugar.
    7. Then stir to combine everything well.
    8. Before serving, garnish the serving dish with the tomato and mint.
    ________________________________________________________________


    You Might Also Like These

    Related Posts Plugin for WordPress, Blogger...