Pages

Saturday, October 01, 2016

DOUBLE CHOCOLATE PISTACCIO BISCOTTI


Saya suka biscotti cara Anna Olson ni, mudah dan ringkas tak perlu dibentukkan seperti log dan didinginkan, adunan terus diletak diatas dulang pembakar dan terus dibakar, sejukkan potong dan bakar semula perghhh memang kena dengan cara saya yang tak suke renyah

Biscotti ini pula memang ranggup, chocolatay dan yang paling best lebih lama simpan dalam container maka ia semakin ranggup. Obviously a keeper

Double Chocolate Biscotti

  • 4 large eggs, at room temperature
  • 1 large egg yolk
  • 1 ¼ cups granulated sugar
  • 2 tsp vanilla extract
  • 2 cups all-purpose flour
  • ½ cup cocoa powder (Dutch process or regular)
  • 1 ½ tsp baking soda
  • ½ tsp salt
  • 1 ¼ cups shelled unsalted pistachios
  • 1 cup dark chocolate chunks, chopped or dark chocolate chips


DIRECTIONS
1. Preheat the oven to 350 °F (180 °C) and line a baking tray with parchment paper.

2. With electric beaters or a stand mixer fitted with the whip attachment, whip the eggs, yolk, sugar and vanilla on high speed until it holds a ribbon when the beaters are lifted, about 3 minutes.

3. Sift the flour, cocoa powder, baking soda and salt and fold this into the whipped eggs until fully incorporated (the mixture will deflate a little, and seem like a cake batter in consistency). Stir in the pistachios and chocolate chunks (or chips) and spoon this onto the prepared baking tray and spread into the rough shape of a single log – the batter will be soft, so don’t worry if the shape isn’t too precise. Bake this for about 35 minutes, until a tester inserted into the centre of the cantucci log comes out clean – because of the melted chocolate chunks within, you may have to test in a few places. Allow this to cool for about 20 minutes and reduce the oven temperature to 300 °F (150 °C).

4. Remove the cantucci log to a cutting board and use a serrated knife to slice across the width into cookies that are ½-inch thick. Arrange these on the lined baking trays (you’ll need 2 trays for this step) and bake for 12 minutes. Remove the trays from the oven and flip the cantucci over, returning to the oven to bake another 12 minutes. Cool the cantucci on the tray. If you find that after cooling, the cantucci aren’t crunchy all the way through, you can return them to the oven to bake a few more minutes.


Notes


RECIPE SOURCE:  Patyskitchen.blogspot.com
All images & content are copyright protected. Please do not use our images without prior permission. If you want to republish this recipe, please re-write the recipe in your own words, or simply link back to this post for the recipe. Thank  You.


Thursday, September 29, 2016

CHOCOLATE PEPPERMINT CUPCAKES


Chocolate dan peppermint adalah atu kombinasi yang segar dan sedap. Cupcake ini adalah chocolate cupcakes biasa yang dihiasi dengan Peppermint Buttercream.  Apa yang menarik tentang resipi chocolate cupcakes ini adalah ia merupakan chocolate moist cake versi cupcake. 

Nyata cupcakes ini cukup moist dan kehebatan peppermint buttercream ini membuatkan cupcakes ini tidak jemu dinikmati.


Chocolate Buttercream Cupcakes

Untuk cupcake


  • 1 cawan tepung
  • 1 cawan gula perang
  • 1/2 cawan serbuk koko
  • 1 biji telur
  • 1 sdt bicabonate soda
  • 1/4 cawan minyak masak
  • 1/2 cawan susu
  • 1/2 cawan air panas
  • 1 sdt vanilla
  1. Satukan semua bahan kering dan ketepikan
  2. Dalam bekas lain kacau semua bahan basah kecuali air panas
  3. Campurkan bahan basah dan bahan kering dan gaul rata
  4. Akhir sekali masukkan air panas dan vanilla dan gaul rata sehingga sebati
  5. Masukkan dalam acuan cupcake dan bakar pada suhu 180 C selama 15 - 20 minit
  6. Sejukkan dan hiaskan dengan buttercream peppermint
Untuk resipi Mint Buttercream klik di sini :-


    Notes

    RECIPE SOURCE:  Patyskitchen.blogspot.com
    All images & content are copyright protected. Please do not use our images without prior permission. If you want to republish this recipe, please re-write the recipe in your own words, or simply link back to this post for the recipe. Thank  You.


    MIXED GRILL MY WAY


    Biasanya mixed grill akan dilengkapi dengan 3 bahan utama, ayam sausage atau lamb, tetapi mixed grill saya kali ini cuma ada dua, ayam dan sausage kerana anak-anak di rumah kurang meminati kambing, anyway dua grill ini sudah memadai.

    Perapan ayam saya cukup simple dan mudah disediakan. Untuk impak yang lebih saya perap ayam semalaman


    Mixed Grill - Perapan Ayam

    • 2 sdb minyak zaiton.
    • 2 sdb Dijon mustard. 2 sdb gula perang.
    • 1 sdb Worcestershire sauce.
    • 2 ulas bawang putih dicincang.
    • 1/2 sdt thyme
    • 1/2 sdt maggi seasoning
    • 1 sdt jus limau nipis
    Gaulkan semua bahan dan perap pada ayam semalaman
    Grill atau bakar sehingga masak.
      Notes


      RECIPE SOURCE:  Patyskitchen.blogspot.com
      All images & content are copyright protected. Please do not use our images without prior permission. If you want to republish this recipe, please re-write the recipe in your own words, or simply link back to this post for the recipe. Thank  You.

      SAMBAL CENCALUK


      Jangan fikir semua orang pernah merasai cencaluk dan jangan fikir juga semua rang tahu apa itu cencaluk...ha...ha baru ini anak berjalan-jalan holiday ke Kota Melaka, saya pun pesan cencaluk....m.k aii dia tanya saya baik apa itu cencaluk. 

      OMG I have to give her the description of cencaluk and told he it was heavenly good with rice. She bught me 2 bottles and I made this sambal....ha kau baru dia tahu bagaimana hebatnya samba cencaluk ini.


      Sambal Cencaluk


      • 1/2 botol cencalok
      • 7 ulas bawang merah ~ di hiris
      • 10 tangkai cili padi hijau ~ di hiris
      • 5 biji limau kasturi ~ perah jusnya dan hiris kulitnya nipis-nipis
      • sedikit nenas ~ di cincang halus
      • 1 biji limau nipis ~ ambil jusnya


      Satukan semua bahan dan gaul rata
      Perahan limau nipis dapat menghilangkan bau hamis cencalok
      .
      Notes


      RECIPE SOURCE:  Patyskitchen.blogspot.com
      All images & content are copyright protected. Please do not use our images without prior permission. If you want to republish this recipe, please re-write the recipe in your own words, or simply link back to this post for the recipe. Thank  You.

      Wednesday, September 28, 2016

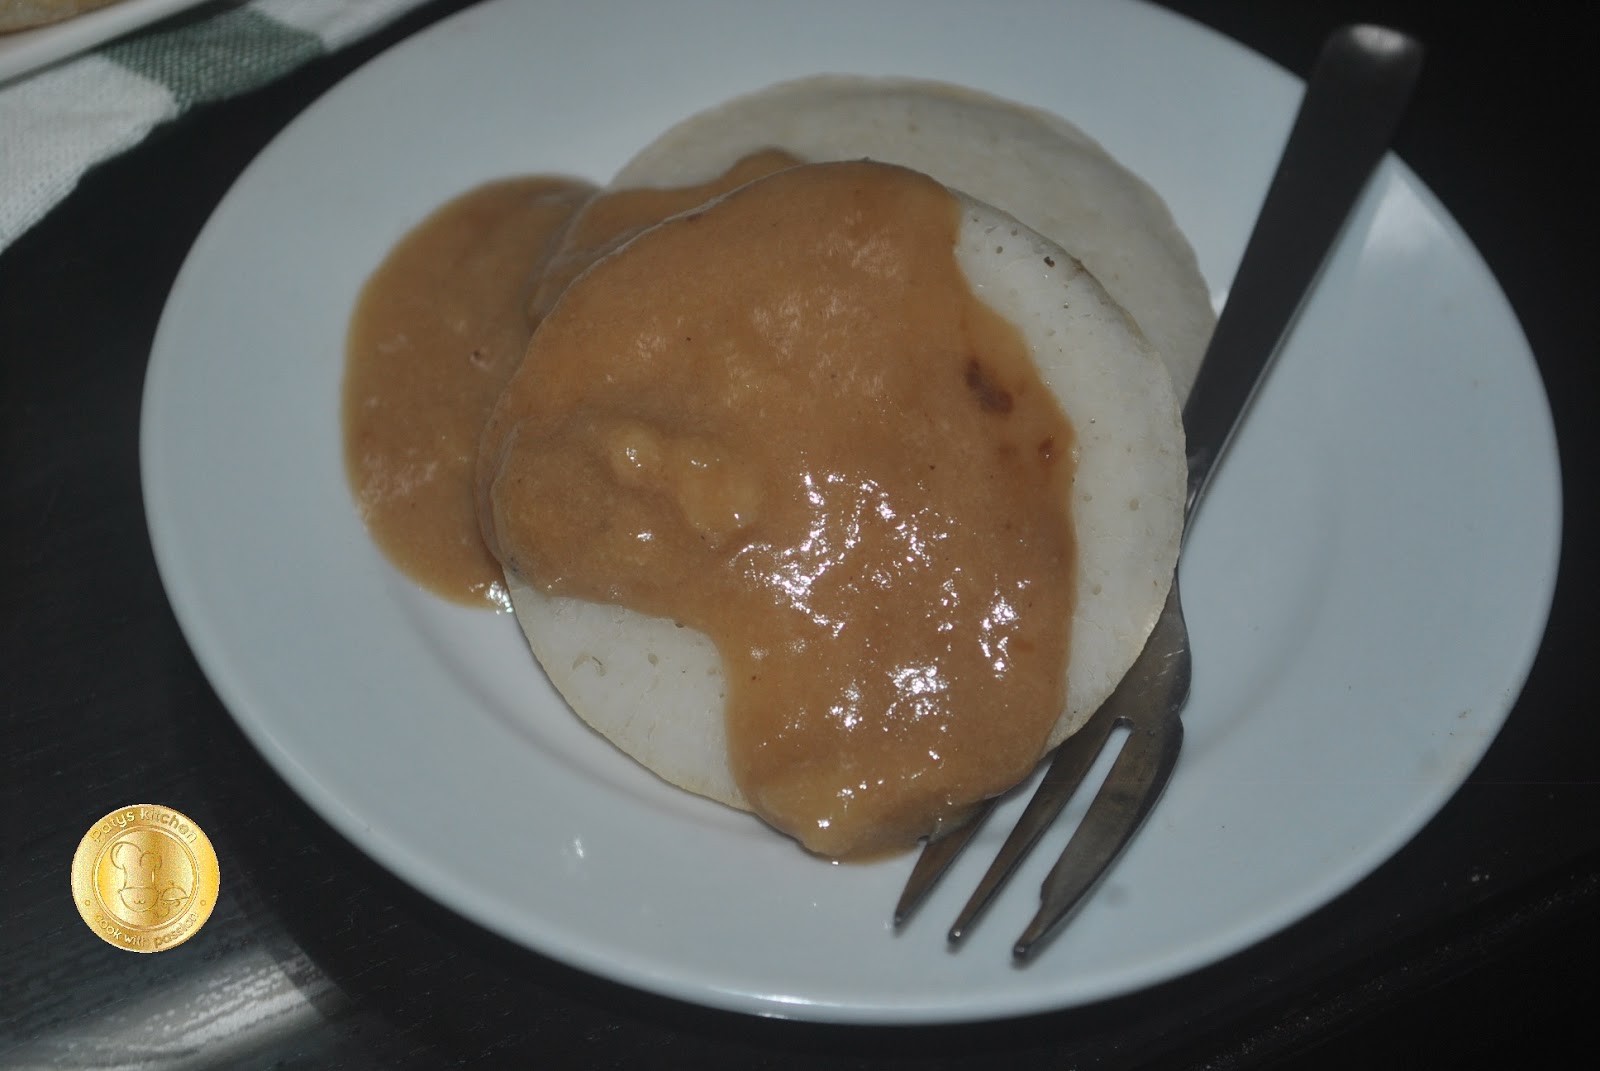
      SERABAI MAMI PATY


      Yang pasti setiap kali balik Penang pasti singgah breakfast di Taman Saadon..ha...ha di situ la adanya serabai yang terbaik. Baru ini balik tapi nasib kurang baik, gerai serabai tutup makanya terkulat-kulat kita dibuatnya tetapi nasib baik adik bawa saya ke kedai di Ujung Pasir katanya beli acuan serabai dan buat sendiri. Resipi serabai pun dia tolong googlekan.

      Balik KL cari durian dan  buat satu adunan, ahamdulillah sampai juga hajat, dan saya cuma peru belajar untuk control api agar serabai tidak gareng di bawah, insyallah next try


      Serabai Kuah Durian

      • 2 cawan tpg beras
      • 3/4 cawan nasi sejuk
      • 1 sudu kecik yis
      • 1/2 cawan santan
      • 1 cawan air
      • 1/2 cawan air suam
      • 2 sudu besar gula
      • sedikit garam


      1. yis, gula dan sedikit air suam dicampur dlm 1 bekas biarkan selama 5 mnit utk memastikan yis aktif...
      2. kisar nasi sejuk dengan 1 cawan air tadi..dah hancur nasi tu
      masukkan garam,tepung beras , santan,dan bancuhan yis tadi kacau sebati ..
      3. Biarkan selama 2 jam lebih dalam bekas tertutup
      4. Panaskan acuan kuih serabai atau dlm pan kecik ke atau dalam acuan kuih bakar..sapu dgn sedikit minyak dalam acuan tersebut...dah betul2 panas acuan tu masukkan adunan dlm acuan... sederhanakan api dapur dan tutup acuan...agak2 dah kering permukaan atas tu menandakan ia dah masak...cungkil guna benda tajam tuk keluarkan kuih dari acuan

      Kuah durian

      • 1 keping gula melaka
      • 2 mgkuk santan sederhana pekat
      • durian 2@3 ulas
      • gula jika perlu
      • daun pandan disimpul
      • sedikit garam
      • 1 sudu tpg gandum*
      • sedikit air *
      • * gandum dan air bancuh terlebih dahulu

      caranya
      1. gula melaka dan sedikit air ..dimasak dahulu kemudian ditapis tuk membuang bendasing 
      2. masukkan santan, durian, daun pandan, sedikit garam dan bancuhan air gula tadi.. masak hingga mendidih dan sentiasa dikacau.. jika kurang manis tambah la gula dan masukkan campuran gandum tadi tuk memekatkan kuah ..kacau sentiasa dan sehingga masak..


        Notes


        RECIPE SOURCE:  Patyskitchen.blogspot.com
        All images & content are copyright protected. Please do not use our images without prior permission. If you want to republish this recipe, please re-write the recipe in your own words, or simply link back to this post for the recipe. Thank  You.

        You Might Also Like These

        Related Posts Plugin for WordPress, Blogger...